Home > News > Videojet machine > Videojet 8520 machine: How the machine was assembled and system configuration set up for the first t
News
Videojet machine
DOMINO A320i printer
Domino white printer maintance
Surprise
company News
product news
Latest News

Videojet TTO6230 E3334 or E3337 Troubleshooting Guidelines

Product: 6230Topic: Overview of troubleshootingguidelines for E3334 or E3337 failures: There are many possible causes for "E3334 Printhead Actuator" o...

How to handle Domino A120 inkjet printer viscosometer failure?

For general problems, for example, the viscometer has no value. It may be necessary to check whether the viscometer valve or the viscometer pipe, or t...

How to edit the information of Videojet 1240 1280 1580 Jet Machine Information?

First of all, create a new information, and order the homework first: Click this plus key to name the information: Then you need to insert information...

How to see Videojet 8520 machine: introduction and information selection of main interface parameter

With a total of four nozzles, this is the usage of the four cartridges. Because it is not turned on, the ink cartridge is not inserted, and the real i...

How to adjust the ink line of the Videojet inkjet printer?

The adjustment ink line has two directions, one is to the left or right: One is to adjust forward or backward: If we want to turn the ink thread for...

Videojet 8520 machine:How to clean the print head if the print quality is not good?

Click on settings. Click on Supplies. Then place a clean cloth or a piece of paper underneath. Click to clean the nozzle and confirm. This is what it ...

Promotional gifts-How to improve keywords ranking-28 SEO kills

Now More and more business man have their own website to show their products, and they want to promoto their products' keywords rank in google or othe...

How to adjust the ink line of Hitachi PXR inkjet printer?

How do we adjust the ink wire to the left or right, we first need to loosen this screw: Then loosen the screw: Then we adjust the screw: When the l...

Videojet TTO hot transfer code machine 6330 print head opening method and ribbon winding method

There is a button here, pressing it down will open the door: Then pull out: Then you can see its entanglement method, and the trend of the direction o...

How to see Videojet 8520 Machine printing content modification and printing?

Modification and Printing of Printing Contents in Videojet 8520 Machine: We can edit the template that we have aleady set up. We choose the second tem...

Videojet 1240 1280 1580 injection machine interface introduction and commonly used tool explanation

Let’s talk about the main interface. From left to right, the product counting, printing count, total printing, total running time; the percentage of ...

TIJ inkjet printer for traceable system customizable coding software

With the economic development and the upgrading of the consumption structure, people are paying more and more attention to the quality of goods, and t...

The story of Raincoat

Suzhou is abeautiful city, where many famous people is in favor of. It’s a happy thing tolive and work here. But when the rainy season comes,endless ...

How to use paracord bracelet to DIY knitted paracord watch

How to use paracord bracelet to DIY knitted paracord watch This is the finished picture. ...

Non Woven bag

Nowadays environmental pollution is big question to all of us, so everybody should be responsible for this and do some thing from our daily life. For ...

How to Install the Videojet 8520 Machine Ink Cartridges?

First, wipe the cartridge with a lint-free cloth in one direction, don't rub it back and forth. Lift the fixing plate up. The cartridge is tilted 45°...

TTO thermal transfer coding machine:Basic operation of Weidijie 6230 machine

Replace the language in the tool:Replace the language in the tool: Then enter the settings, point control, there will be language settings: The first ...

How to see Videojet 2351 explainer video?

Now it is the Chinese interface, here are the print files, print frequency, current count, and switch language point settings: click control: Enter th...

The Origin of the Christmas Tree

Modern Christmas tree originated in Germany, then gradually became popular in the world scope, and became one of the most famous traditional Christma...

How to Decorate Indoor Ornaments When Christmas Knocks

Christmas Day is a warm and romantic holiday. If you decorate it a little, you can get a romantic and warm home. Christmas Day gives us the main feeli...

How to make DIY loom bands bracelets?

Do you know how to make DIY loom bands bracelets ? Here is a instruction teaching you make it. Please follow this instruction, just a few easy steps, ...

Videojet 8520 Machine:How to Adjust the Photoelectric

After the ink cartridges are installed, let's see how the machine works. It is now off. Click the blue button to start. If offline, press the green bu...

Install the PBA board High voltage pack Power supply Motherboard of Videojet 1000 electronic cabinet

Let's install the PBA board first,before installation, the interface between the front and back should be arranged: Then we gently insert the PBA boa...
Contact Us
CONTACT US ,BEST SERVICE AND COST IS FOR YOU    Tel:86-512-62810865      Fax:86-512-67301180       Email: sales@cheef.cn    Whatsapp &MP and wechat:+86 181 6857 5767 Contact Now

News

Videojet 8520 machine: How the machine was assembled and system configuration set up for the first t

2022-09-02 16:50:49

Install the sprinkler. The machine has a total of four nozzles, no matter how many nozzles there are, the installation method is the same.
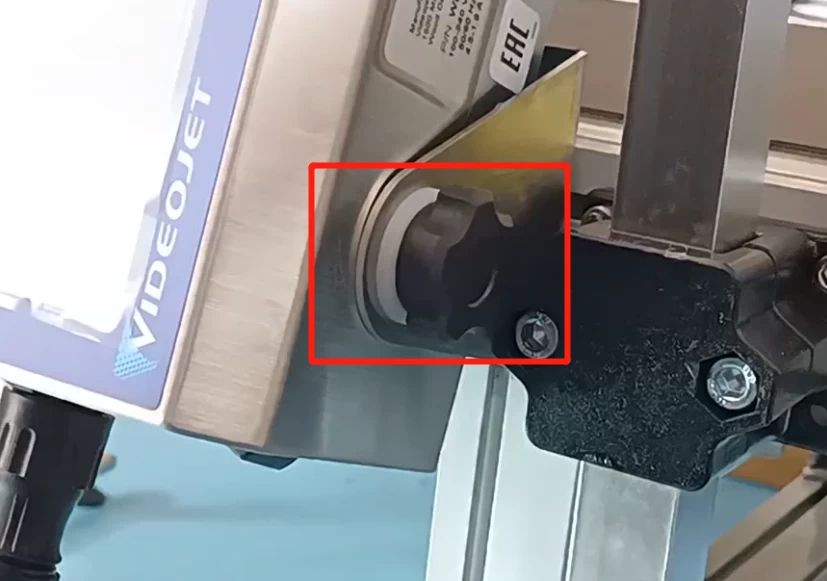
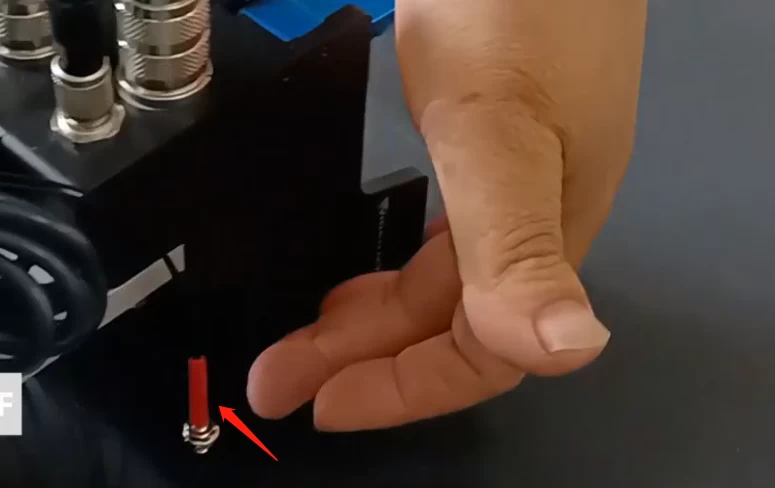
Fix the nozzle .


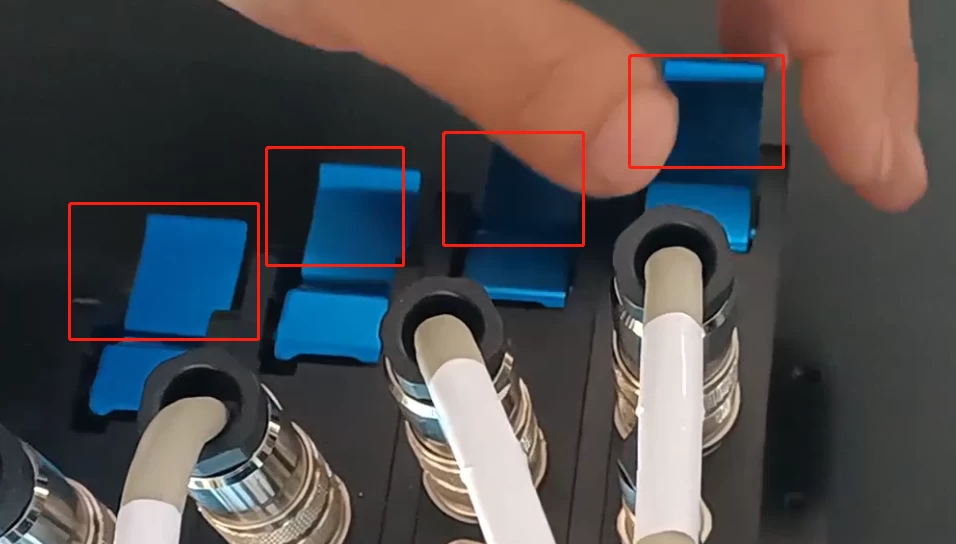
There are screw holes on the side of the first, second, third and fourth nozzles. Fix the screws in the holes and tighten them.

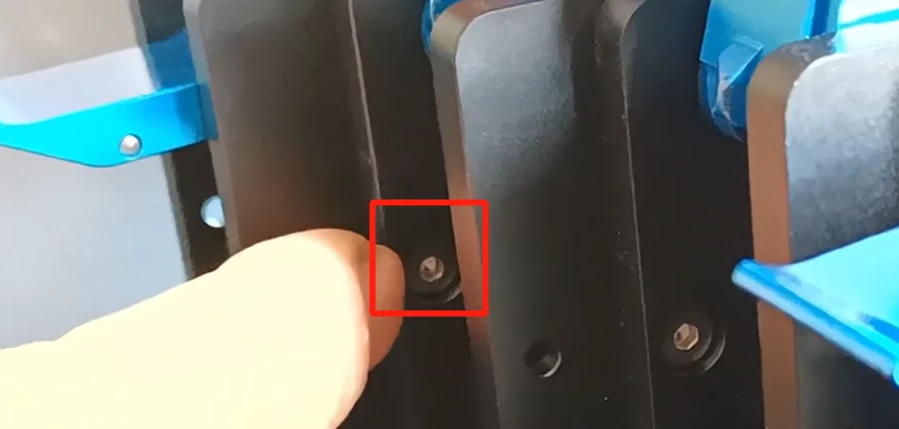
Then fix the screws of the combination board below. The combination board is used to fix the lower part of the nozzle. Tighten these three screws.

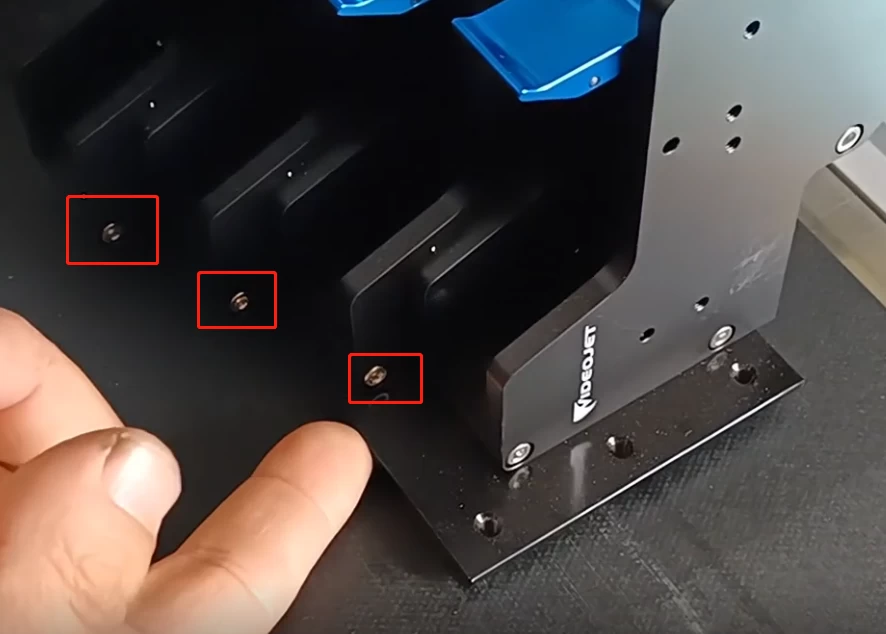
We first assemble the sprinkler head, after assembling, install the lower combination board, and the sprinkler head is fixed.

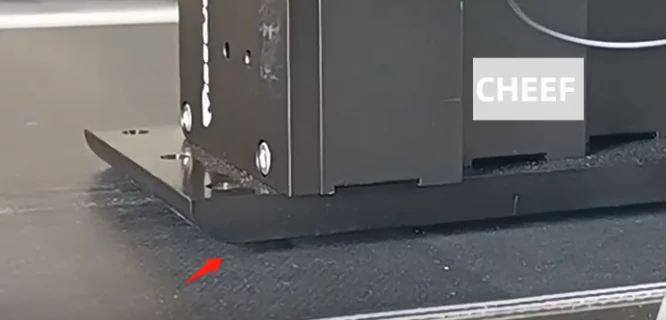
Install the controller. First install the fixing plate on the side of the conveyor belt, there are two screws on it, and install it through the holes on the aluminum profile.

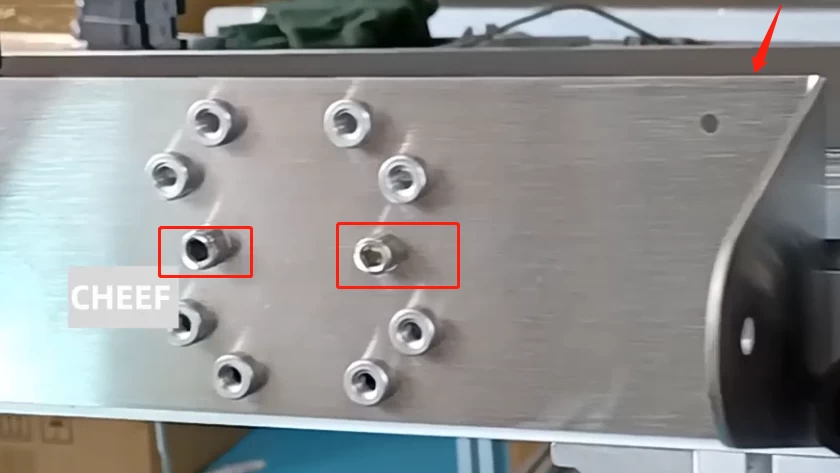
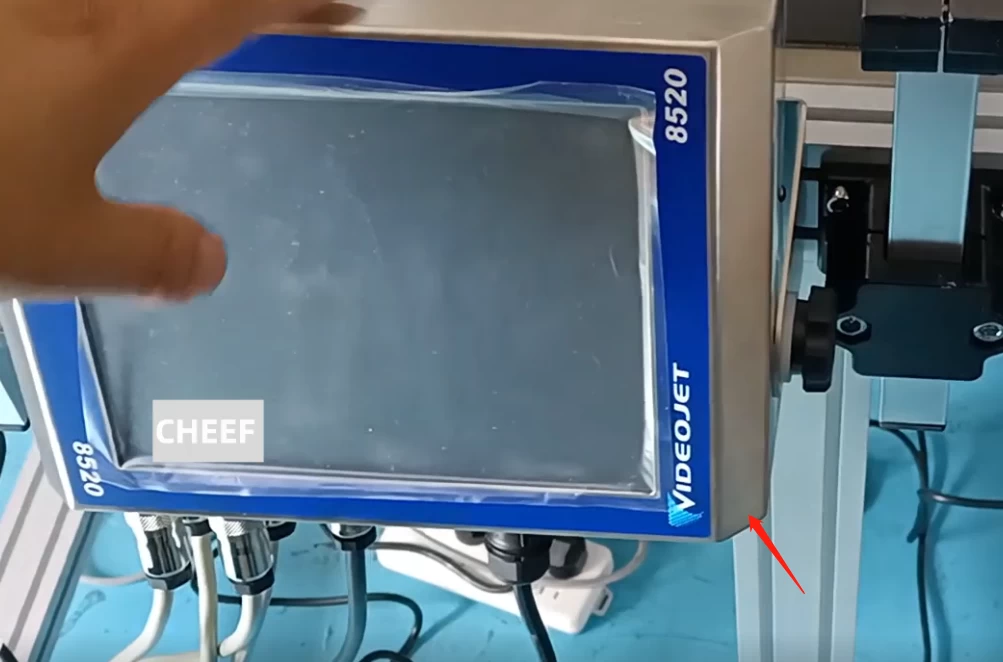
There are holes on both sides of the controller, we tighten the fixing screws on both sides, so the controller is installed.

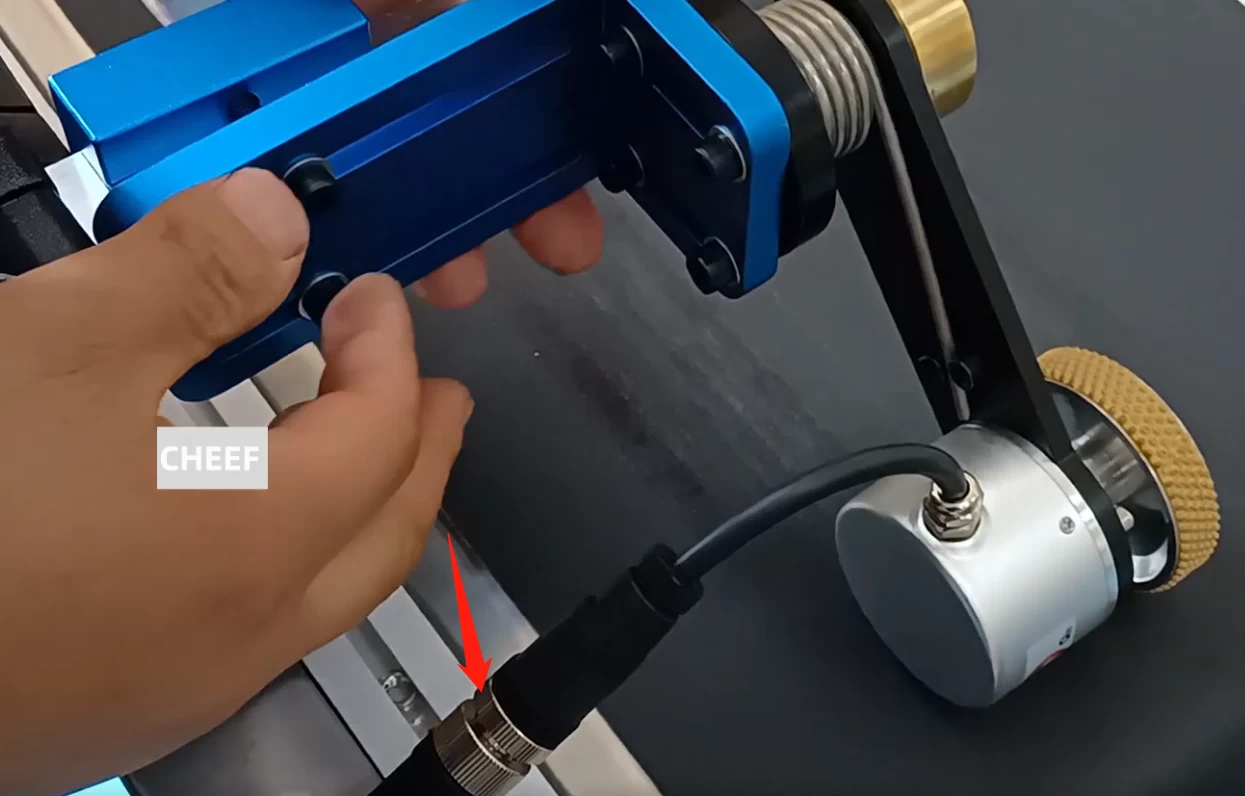
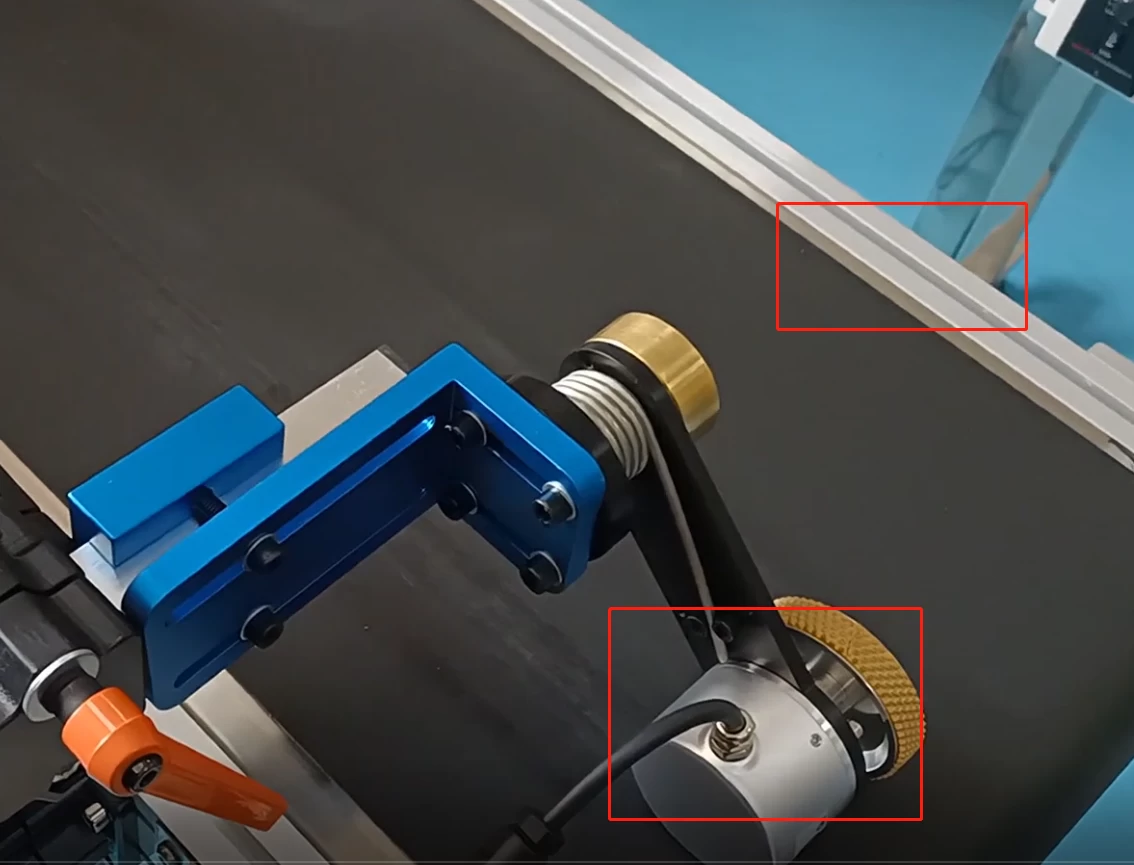
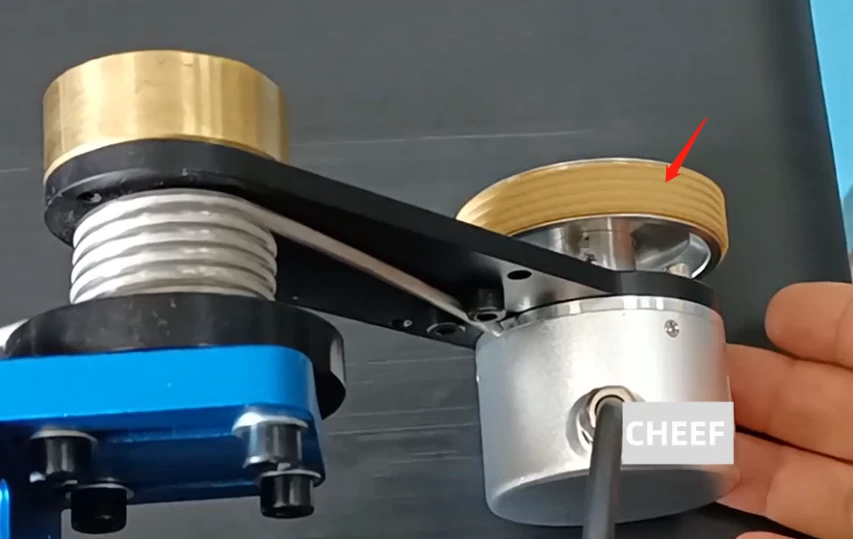
Install the encoder wire first.

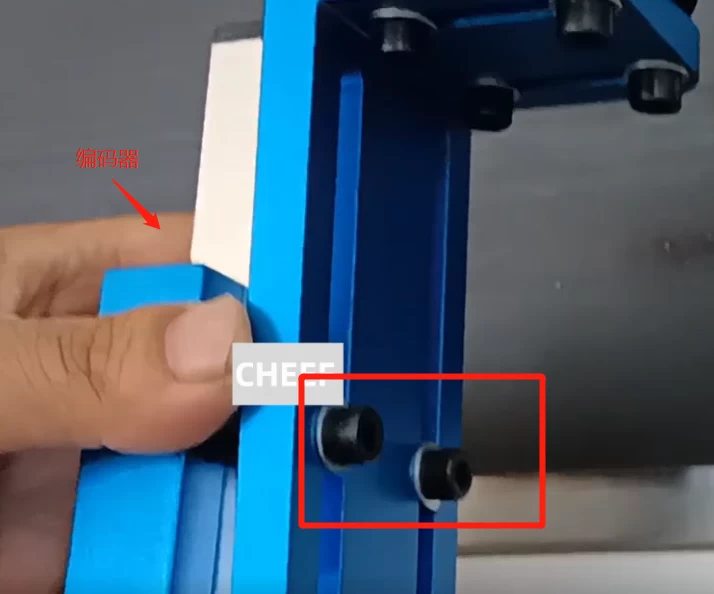
Loosen these two screws first, you can take out the encoder.

This is the cross arm, the basic structure is like this.

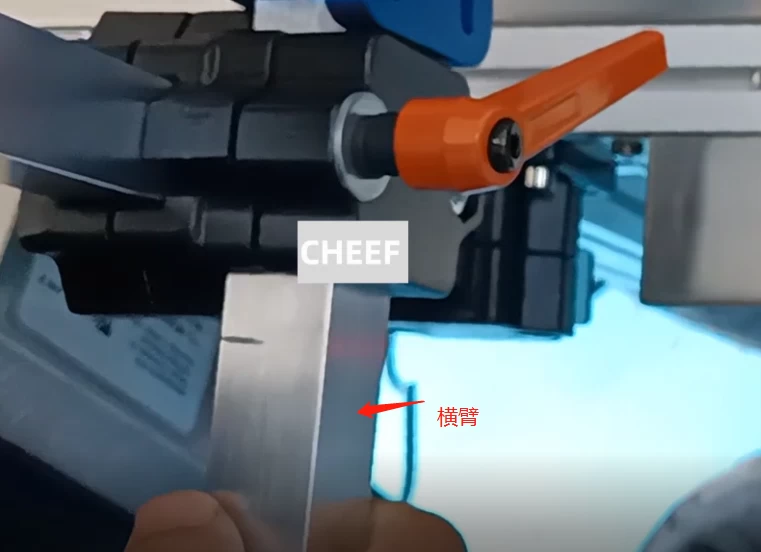
Installing this machine requires a certain amount of resistance, you can install it on this side or on the opposite side.

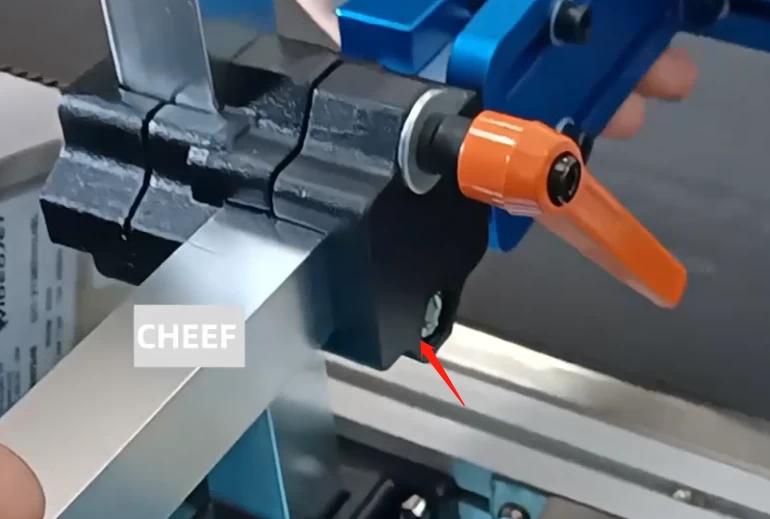
The lower fixing block is also fixed on the aluminum profile, with a fixing bracket .

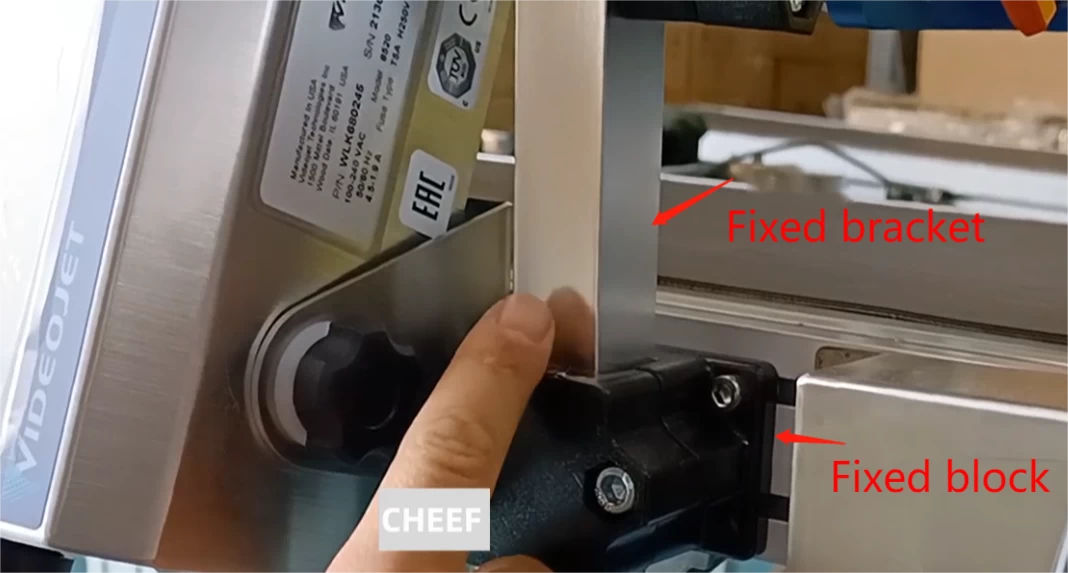
Here it is fixed in this position with an adapter.

This is a photoelectric. Be sure to remember whether this photoelectric is placed on 1 or 4. If it is placed on 1, you must select the photoelectric above 1 when setting it.

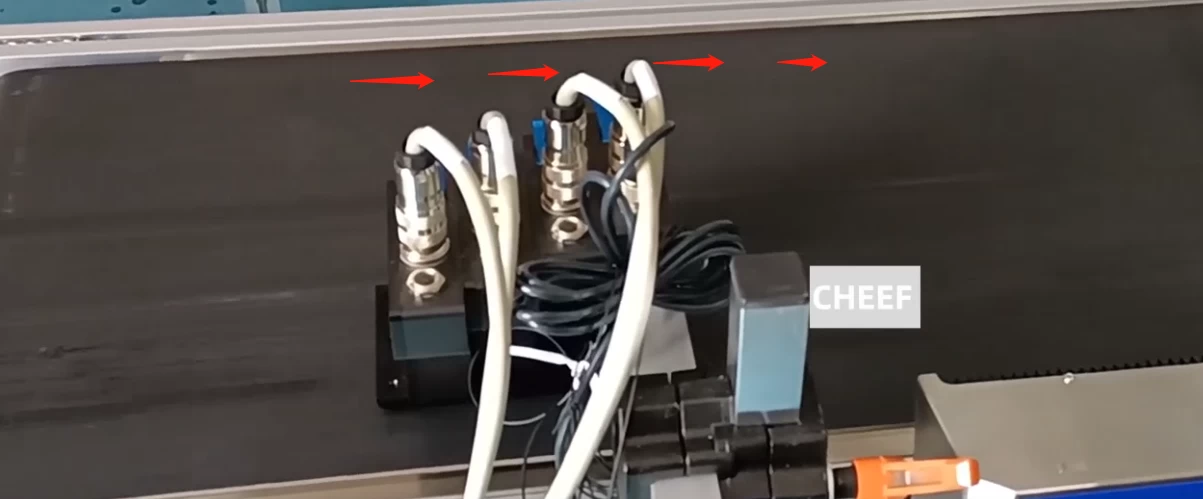
The four lines above are arranged in sequence as shown in the figure, and the line with the corresponding serial number under the machine is connected to the corresponding nozzle.

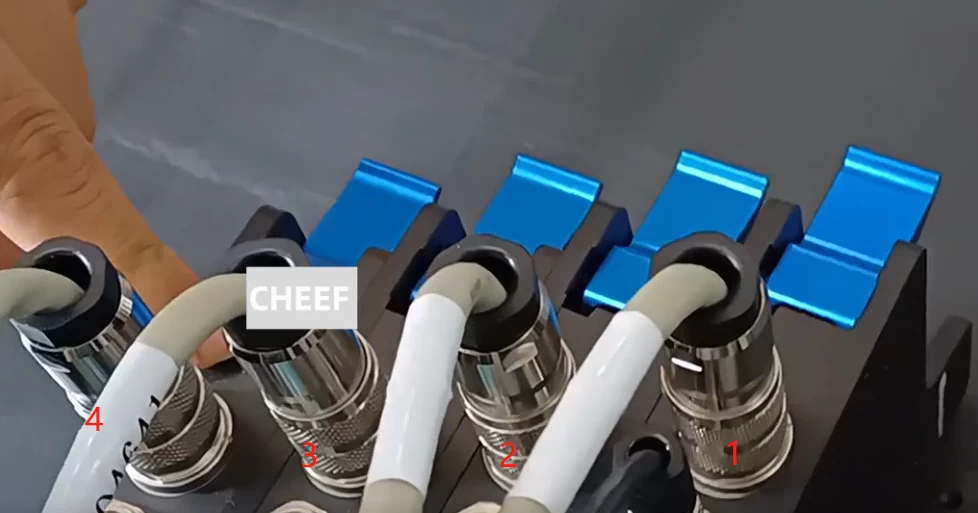
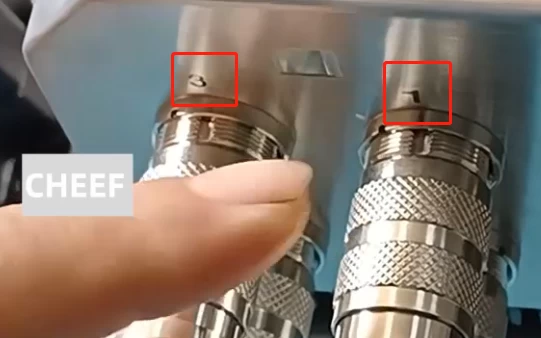
These four white lines are the four lines of the nozzle, which are marked with serial numbers; the lines of the encoder are marked with ENC.

Note: The distance between the nozzle and the surface of the product should be about 2 mm, preferably within 2 mm, the closer the better.

Look at the direction of the conveyor belt, we stand behind the nozzle, we can see that the conveyor belt is turning from left to right.

The encoder is also rotating, because there is a certain resistance, so the encoder is also rotating, so the basic installation of the machine is no problem.

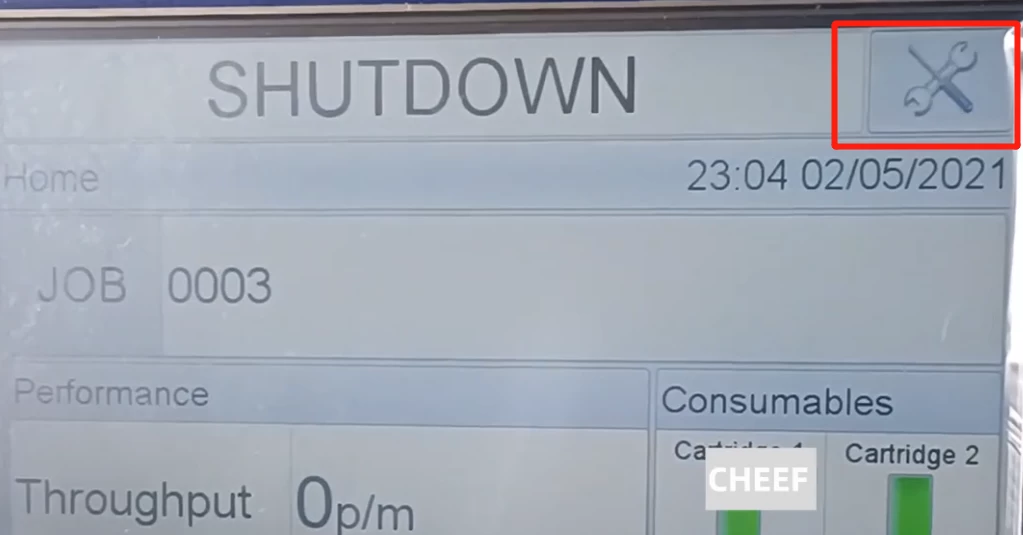
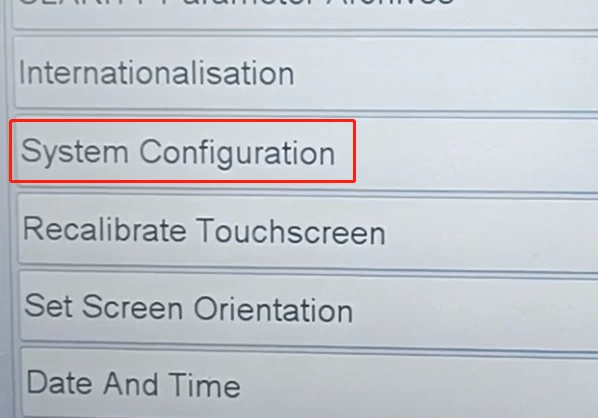
The machine is assembled and set up first, and then the machine is set up. When the machine is first received, we need to set it up.

After selecting the system configuration, click Next, you can set the language, date, time, etc. as needed .

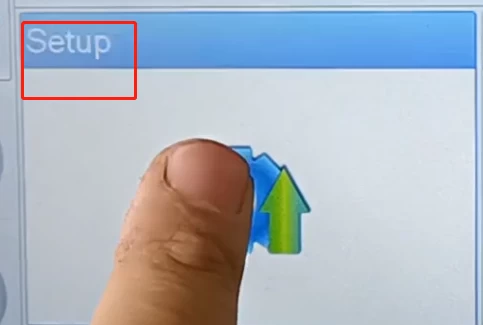
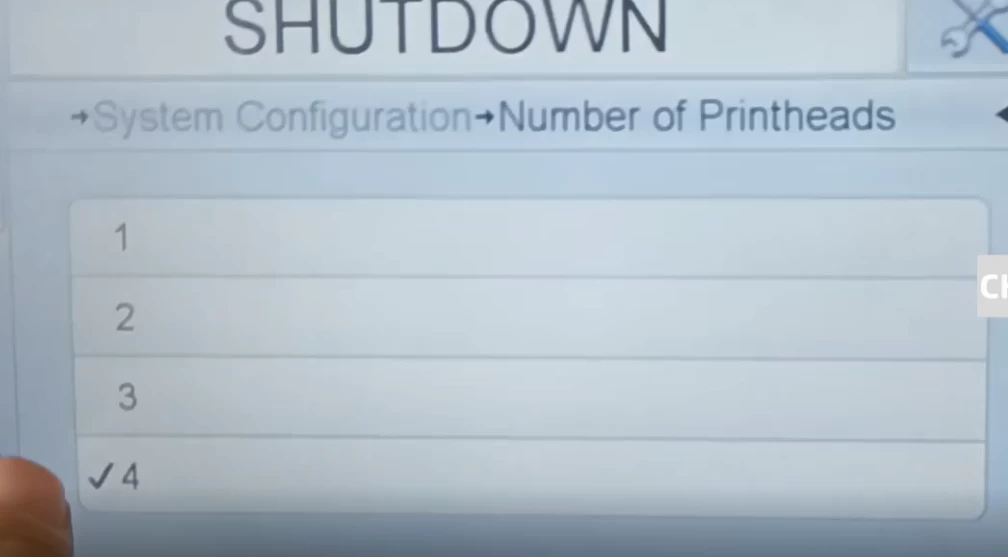
After the date language time is set, click next, this machine is 4 print heads and together, so choose 4. Next select 4 as well.


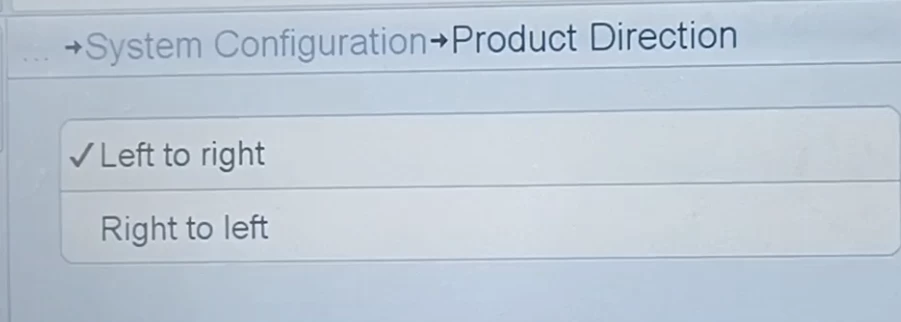
When selecting the conveying direction, we stand behind the nozzle, and we can see that the conveyor belt is turning from left to right, select the first option.

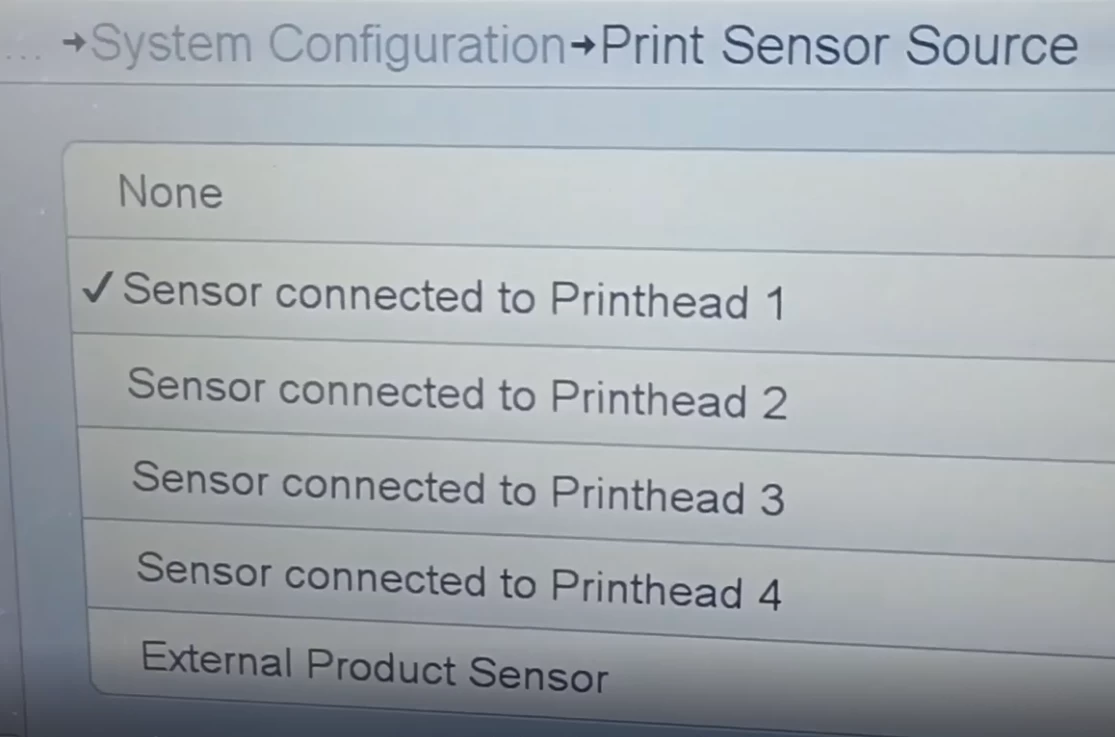
Whether the sensor is internal or external or automatic, this machine is external.

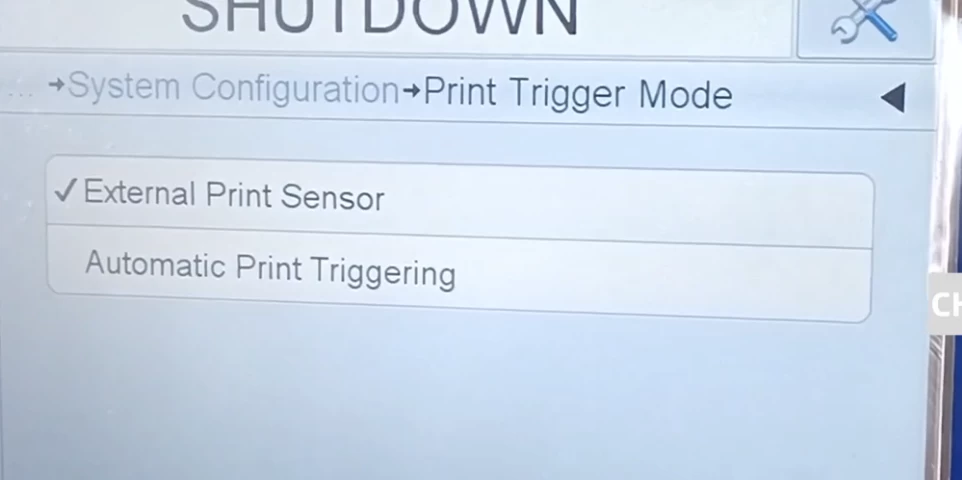
Which nozzle is the sensor installed on, this machine is installed on 1.

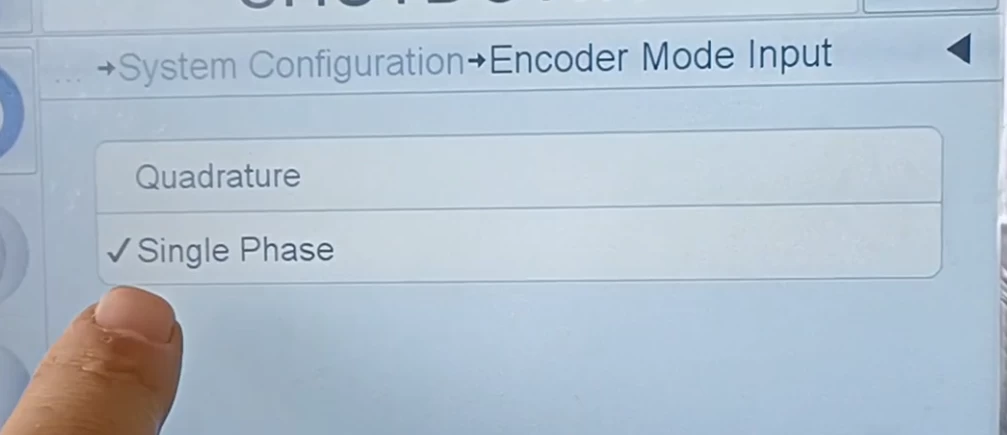
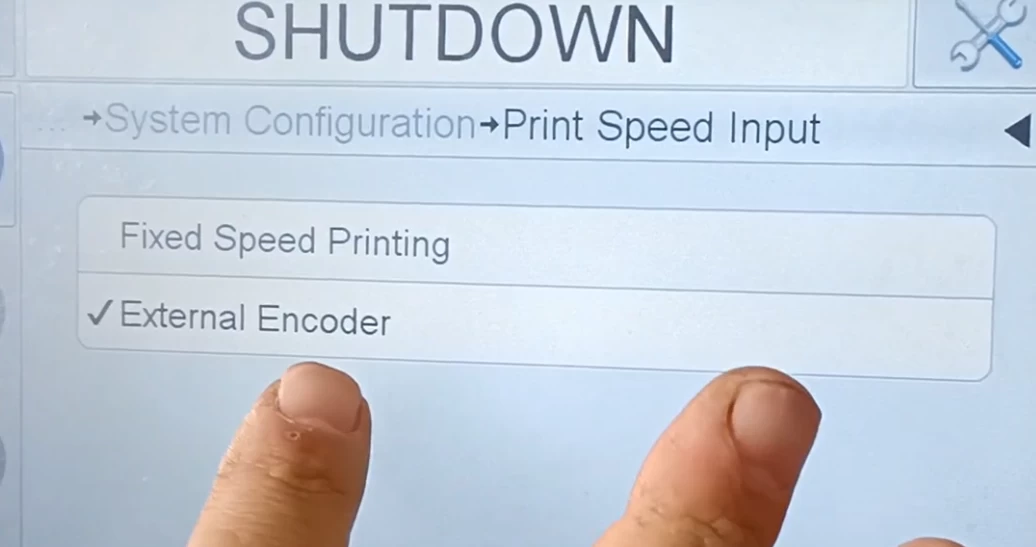
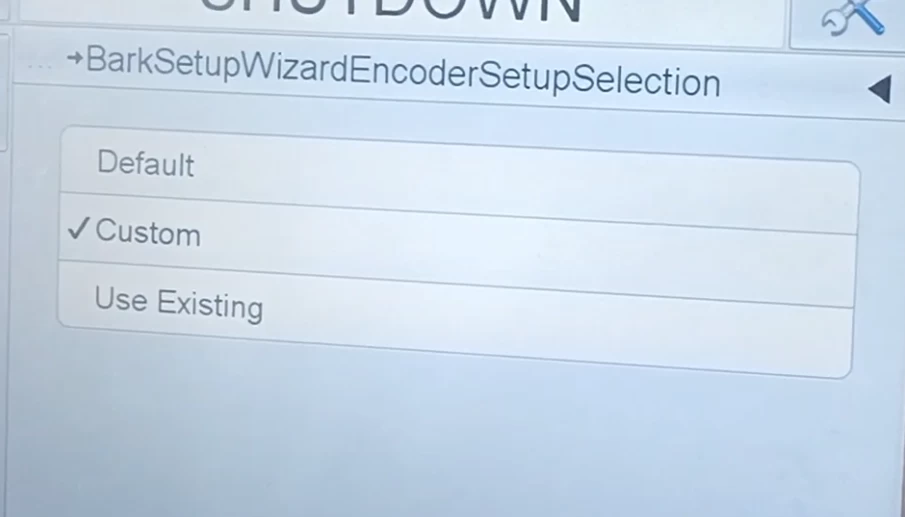
Select the printing method, we choose the encoder mode, because the encoder mode used, select the encoder mode, the encoder mode has default and custom, we choose custom.

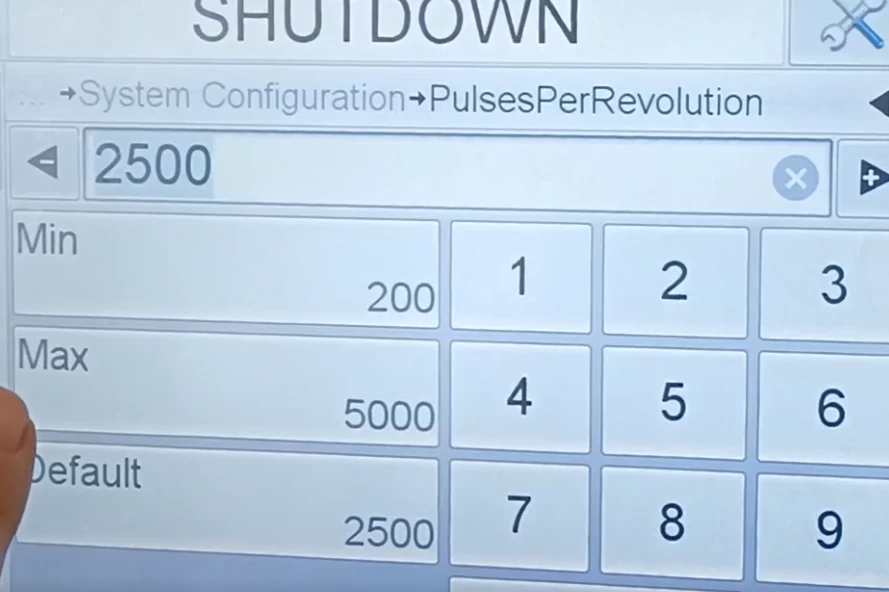
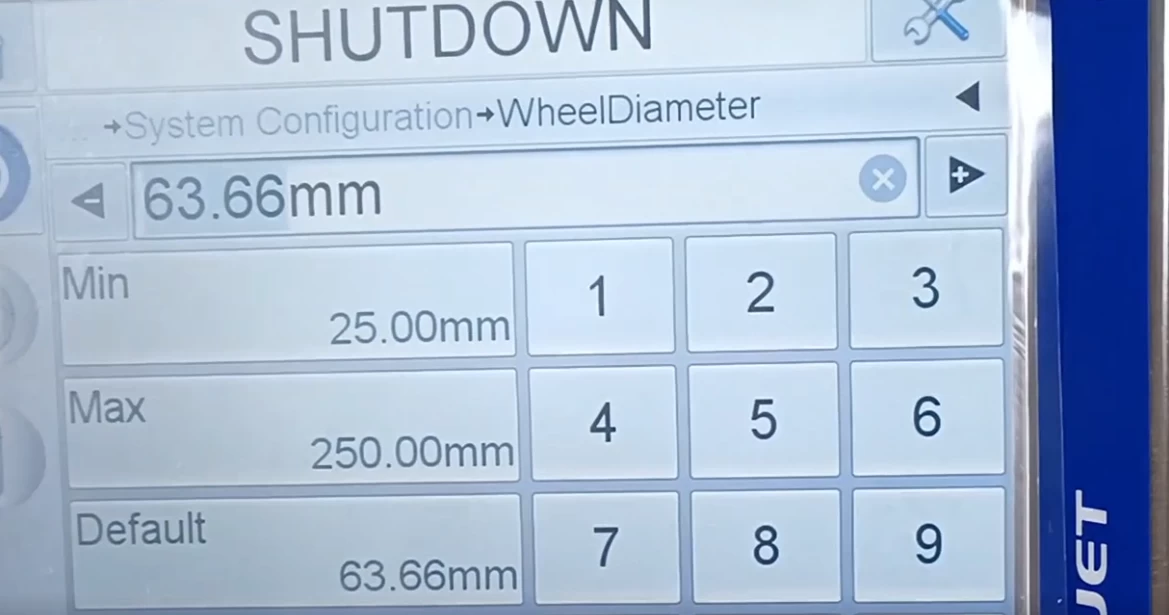
Here you need to set the pulse, the specific value depends on the number on the encoder; the diameter also depends on the encoder, the original encoder is used, and the diameter is 63.66.

Then set the encoder mode input, and the system setting is completed. Only use the mentioned parts, and the unmentioned parts can be ignored.