


Videojet TTO6230 E3334 or E3337 Troubleshooting Guidelines
2022-09-20 13:13:18
Product: 6230
Topic: Overview of troubleshooting
guidelines for E3334 or E3337 failures:
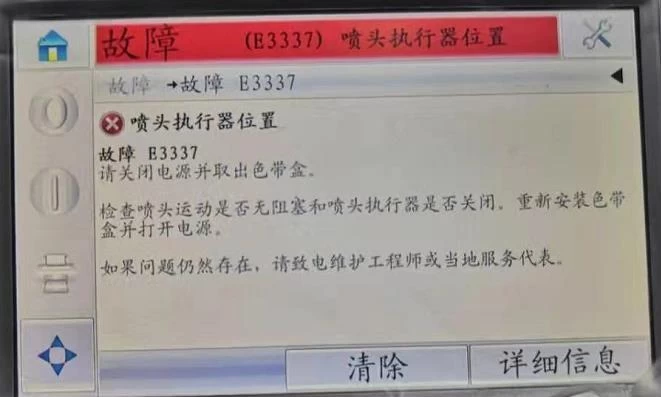
There are many possible causes for "E3334 Printhead Actuator" or "E3337 Printhead
Actuator Position" failures that may occur on the 6230 printer, please refer to the following
guidelines for troubleshooting.
Possible root causes are:
1. Improper distance between the printhead and roller or obstruction of printhead
movement.
2. Loose or missing cylinder stopper on the printhead support.
3. The screws of the print head bracket are loose.
4. Improperly positioned spring on actuator.
5. Dirty, blocked or faulty actuator sensor
6. Actuator sensor pins are loose or damaged.
7. Actuator connection loose.
8. Problem with actuator (magnet).
9. Problem with print head.
10.There is a problem with the main circuit board.
Technical Support Memo
Technical Support Documentation Solution:
1、Restart the printer and see if the problem persists.。
Rebooting the printer will cause the actuator to perform its initial calibration again, while
simply clearing the fault will not, so after simply clearing the fault rather than restarting the
printer, the fault is likely to reappear.
2、Make sure there is proper clearance between the print head and the rollers.
This failure will occur if the gap is too small or too large. The VJ6230 supports
a printhead-to-roller distance of 1.5 - 2.5mm, and a 2mm gap is recommended.
3、In intermittent applications, make sure there are no physical obstacles preventing the
printhead from performing its back and forth motion.
4、Make sure that the stop posts on the printhead bracket (Figure 1) are not loose or missing.
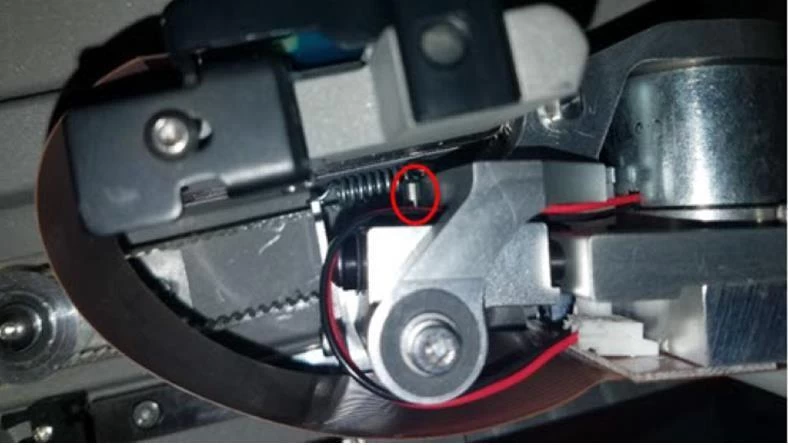
Figure 1: Limit post locations.
5、Make sure the screws on the printhead carriage (picture 2) are not loose
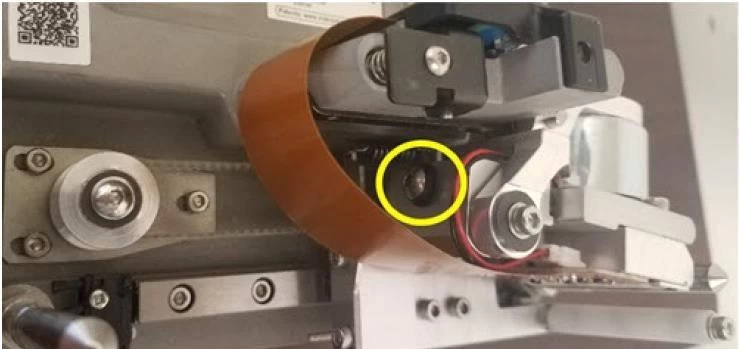
Figure 2: Printhead Carriage Screw Locations.
6、Make sure the spring in the actuator is in the correct orientation (fig 3). There is a black
mark on the spring and it should be on top of the spring and centered on the printhead
facing forward. Incorrect spring orientation can cause the printhead to drop unevenly, causing
malfunctions.
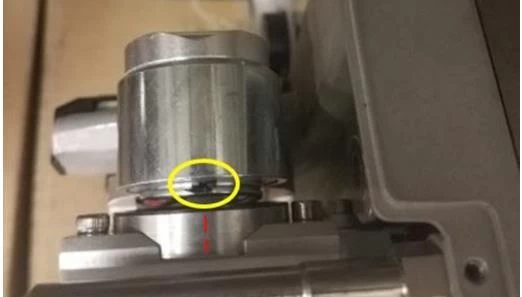
Figure 3: Correct actuator spring orientation.
7、Make sure the actuator sensor located on the printhead is not dirty or obstructed. Figure 4
below describes its location.
8、Make sure the actuator sensor pins (Figure 4) are not loose or damaged.
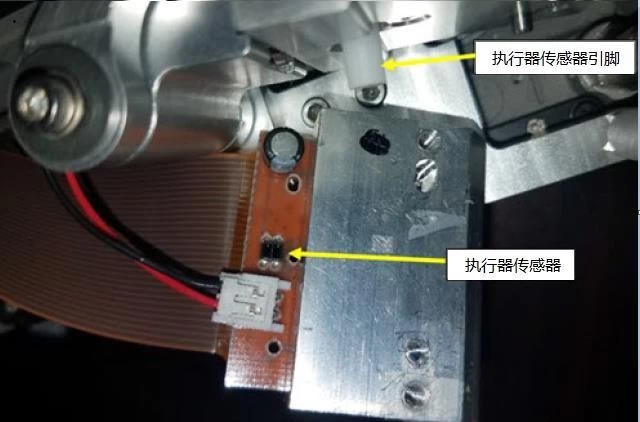
Figure 4: Actuator sensor pin locations.
9、Make sure that the actuator plug connection on the printhead is not loose (Figure 5).
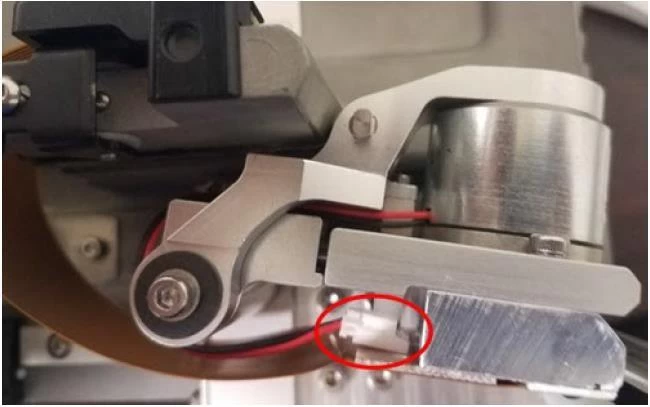
Figure 5: Actuator connection plug location.
10、Carefully disconnect the actuator connector from the print head (Figure 6) and use a
multimeter to measure the resistance of both pins, which should be around 2.5 ohms.

Figure 6: Measurement location of the actuator resistance.
11、Visually inspect the electrical components of the printhead (Figure 7) for obvious signs of
false soldering.
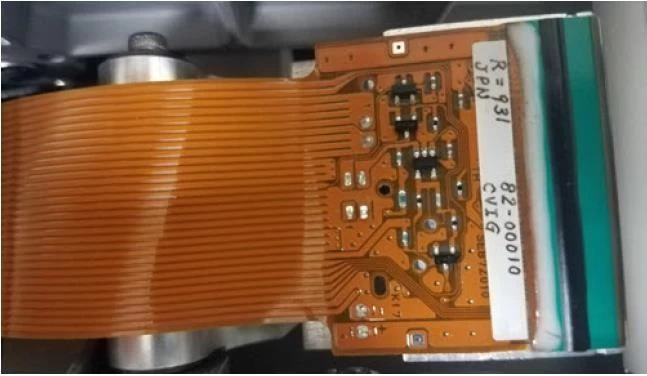
Figure 7: Printhead Electrical Components.
12、Referring to the 6230 training manual, use a multimeter to check the test points on the
main board of the print body.
Action Request:
None, for notification only.