Product: 6230Topic: Overview of troubleshootingguidelines for E3334 or E3337 failures: There are many possible causes for "E3334 Printhead Actuator" o...
First of all, create a new information, and order the homework first: Click this plus key to name the information: Then you need to insert information...
For general problems, for example, the viscometer has no value. It may be necessary to check whether the viscometer valve or the viscometer pipe, or t...
Let’s talk about the main interface. From left to right, the product counting, printing count, total printing, total running time; the percentage of ...
With a total of four nozzles, this is the usage of the four cartridges. Because it is not turned on, the ink cartridge is not inserted, and the real i...
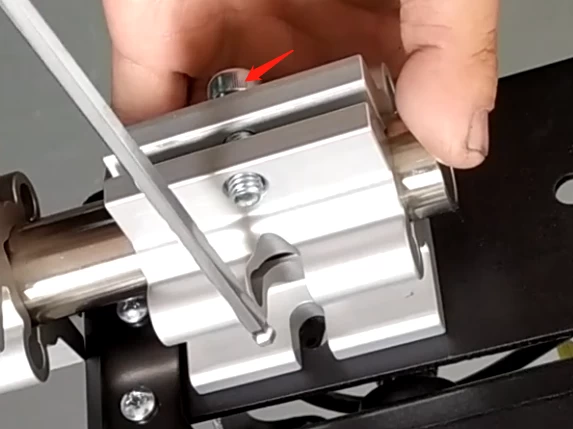
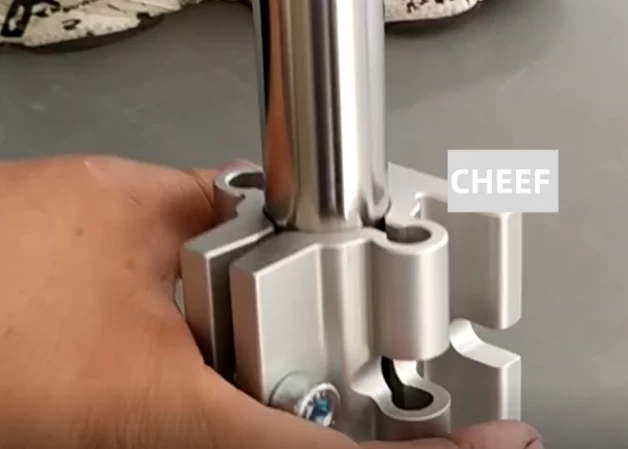
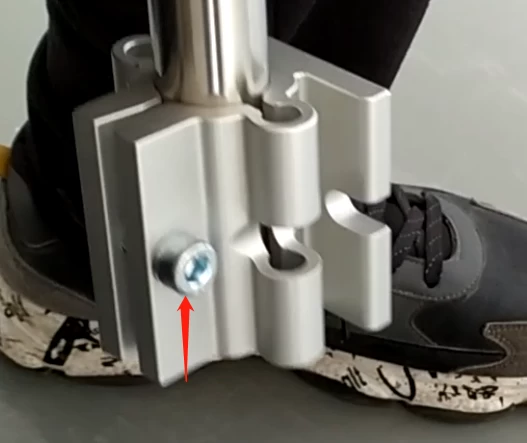
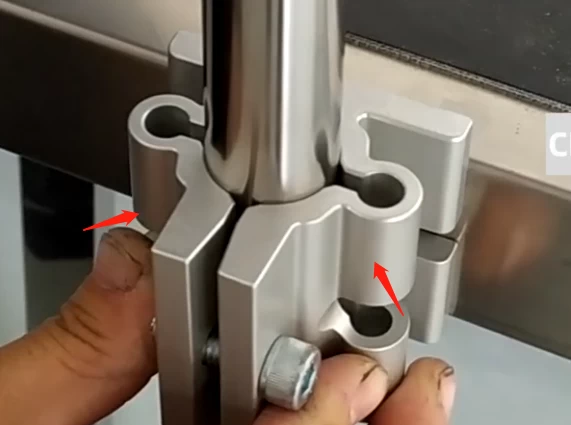
The adjustment ink line has two directions, one is to the left or right: One is to adjust forward or backward: If we want to turn the ink thread for...
Click on settings. Click on Supplies. Then place a clean cloth or a piece of paper underneath. Click to clean the nozzle and confirm. This is what it ...
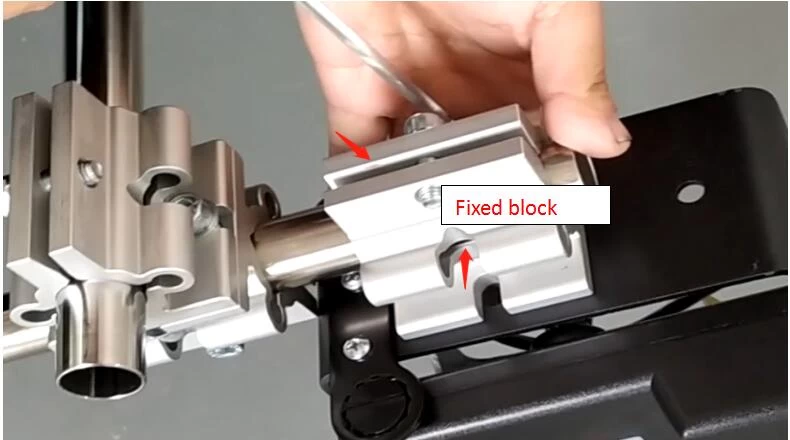
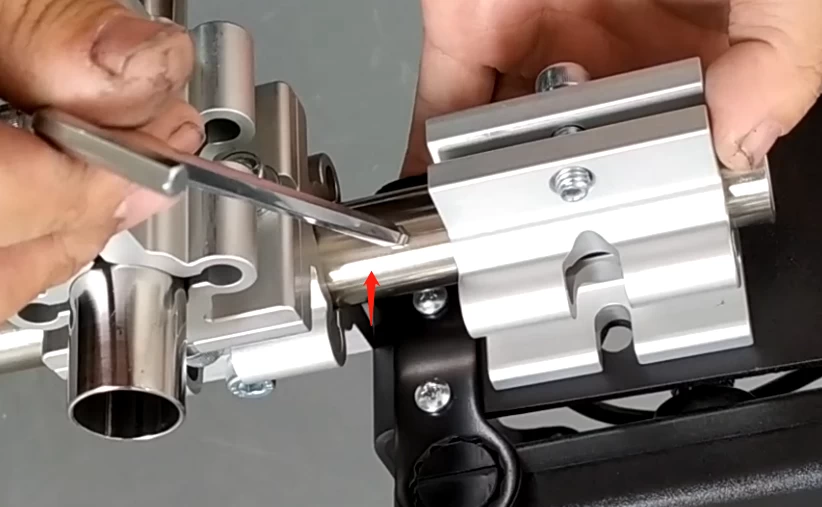
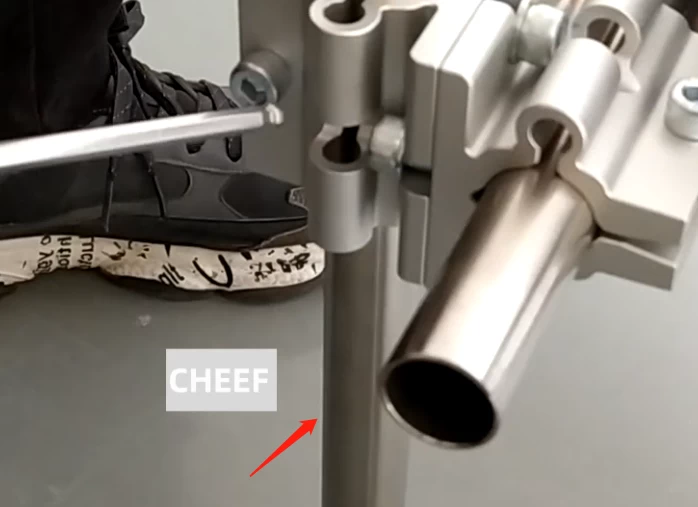
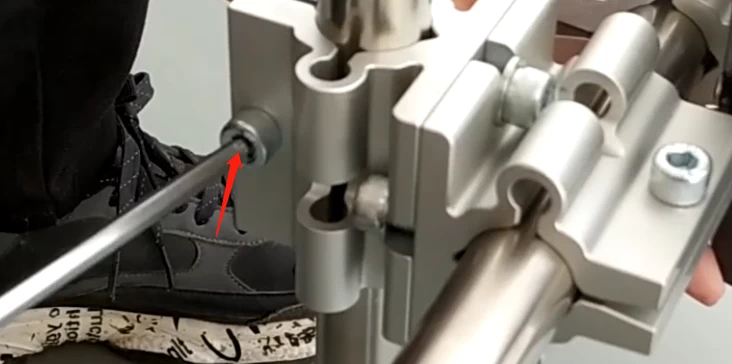
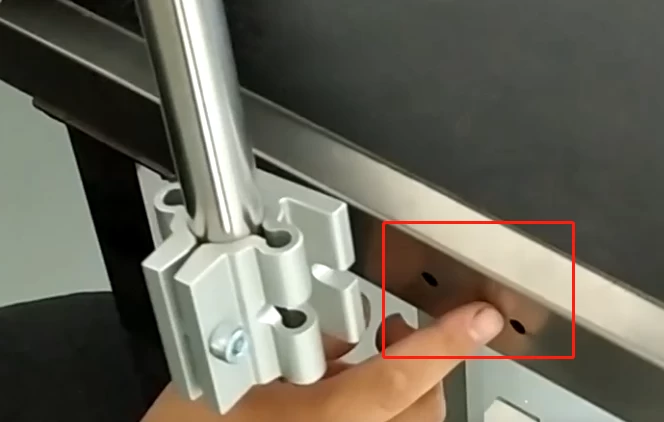
How do we adjust the ink wire to the left or right, we first need to loosen this screw: Then loosen the screw: Then we adjust the screw: When the l...
If it reports a high-voltage fault, let's first look at whether there is ink on the high-pressure deflection board, if there is ink, we use cleaning l...
Modification and Printing of Printing Contents in Videojet 8520 Machine: We can edit the template that we have aleady set up. We choose the second tem...
Now More and more business man have their own website to show their products, and they want to promoto their products' keywords rank in google or othe...
With the economic development and the upgrading of the consumption structure, people are paying more and more attention to the quality of goods, and t...
There is a button here, pressing it down will open the door: Then pull out: Then you can see its entanglement method, and the trend of the direction o...
Now it is the Chinese interface, here are the print files, print frequency, current count, and switch language point settings: click control: Enter th...
Replace the language in the tool:Replace the language in the tool: Then enter the settings, point control, there will be language settings: The first ...
Machine parameter adjustment:Look at how the pressure and modulation voltage are adjusted. First press the wrench key: Then press this wrench key: P...
Suzhou is abeautiful city, where many famous people is in favor of. It’s a happy thing tolive and work here. But when the rainy season comes,endless ...
First, wipe the cartridge with a lint-free cloth in one direction, don't rub it back and forth. Lift the fixing plate up. The cartridge is tilted 45°...
How to use paracord bracelet to DIY knitted paracord watch This is the finished picture. ...
Nowadays environmental pollution is big question to all of us, so everybody should be responsible for this and do some thing from our daily life. For ...
After the ink cartridges are installed, let's see how the machine works. It is now off. Click the blue button to start. If offline, press the green bu...
Modern Christmas tree originated in Germany, then gradually became popular in the world scope, and became one of the most famous traditional Christma...
Do you know how to make DIY loom bands bracelets ? Here is a instruction teaching you make it. Please follow this instruction, just a few easy steps, ...