


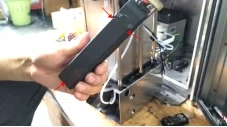
How to disassemble and assemble the print head of the IMAJE 9232 inkjet printer?
How to disassemble and assemble the print head of the IMAJE 9232 inkjet printer?
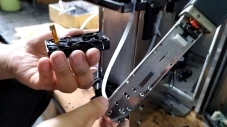
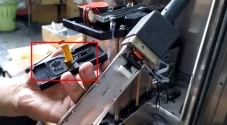
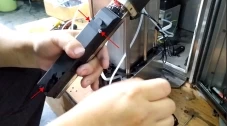
See how the print head is disassembled,
Then we'll take this off:
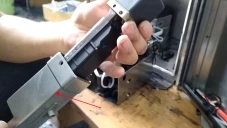
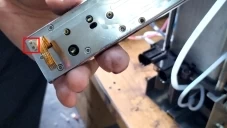
There are two screws on it. After removal, the cover can be directly removed:
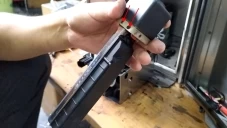
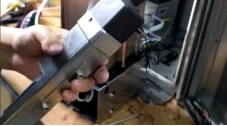
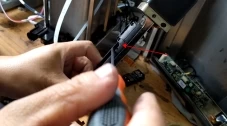
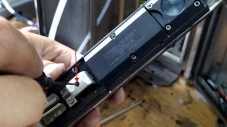
Then first we remove the solenoid valve:
Be careful when you take it down, it has washers on it, don't get rid of them:
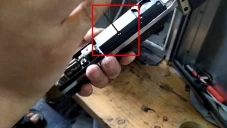
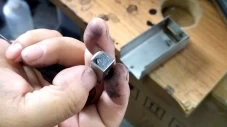
After removing it, we can remove the four screws from the nozzle filter,then it can be taken off:
Then the nozzle filter can be removed:
If maintained, the filter will be replaced:
Its disassembly is like this, how to remove how to install back can be.
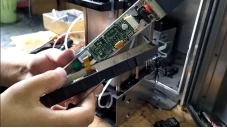
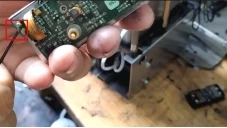
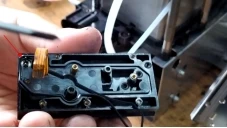
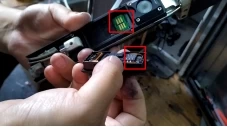
Let's see how the board on the print head is removed,
Remove the three screws:
It can be taken off:
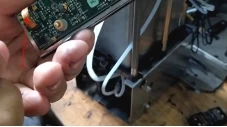
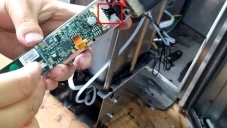
Then we take off the line above:
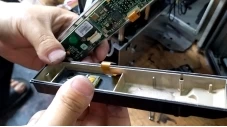
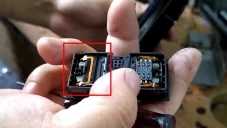
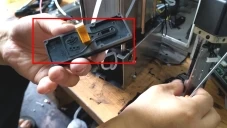
And then there's a board, and we'll take it off,
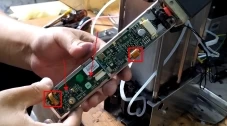
Be careful when you remove the board, it doesn't take it apart first:
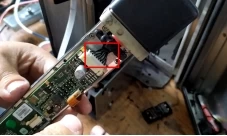
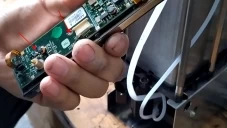
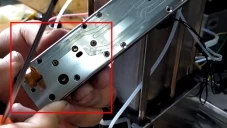
When the board is removed, pay attention to this position, this position is particularly easy to drop, can not let it fall:
Hold it by hand and remove the line:
Then we take this row down:

There are two little screws we take off:
The screw is small, don't let it fall off.
Finally, unplug the top row, and the board can be removed:
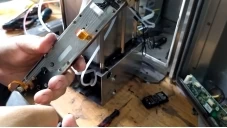
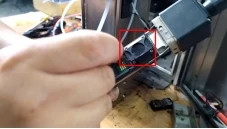
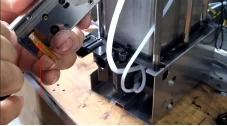
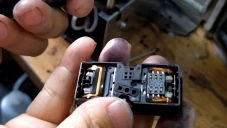
Then we remove the valve module here:
Take the corresponding screws off, we take them off, and then this one can be removed:
To slowly remove, be sure to pay attention to the valve module has washers, the above washers must not fall:
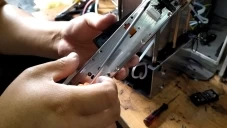
We took the piece below off and removed the screws first:
After removing all the screws, gently remove it:
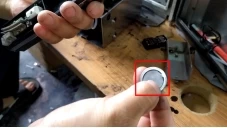
Here's a washer, be sure to pay attention:
The washers inside must be installed in place, be careful.
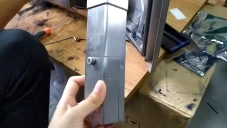
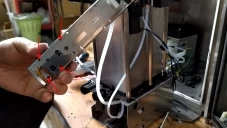
The print head is all disassembled here.
We'll have to put the line through first when we assemble,The row of the recycling tank we put it in:
Let's install four screws to secure it:
Then we put the valve module to the installation, before installation to see if the washer is loose or off.If it is loose or falls off, be sure to install it in place:
When installing it, it is also the first to insert the wiring, and then the screws installed on it.
Then install it, very small:
Then install the board,plug this line in first:
Install the screws and then plug the lines in:
The board was almost installed.
We installed the high-pressure plate:
Then we install the solenoid valve. The solenoid valve can be divided into positive and negative parts. The electrified part and the board should be put together:
Check whether the washer has fallen, if it is dropped, it cannot be installed. The washer must be on the solenoid valve:
Then we install it:
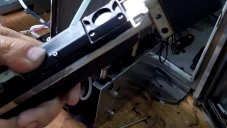
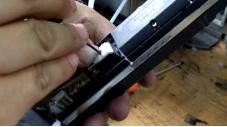
Let's see how the nozzle is removed, just loosen the screw and the nozzle can be removed:
The nozzle was removed:
Get it stuck, then tighten the screw and the nozzle is installed:
Then we put the lid on: